Tag Archives: theme

Pumpkin Enchiladas

15 Dec


Theme: Savory Pumpkins

Reviewed by: Tortnado

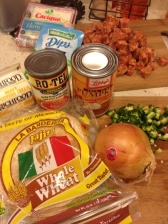
Ingredients:
  • 3 tablespoons butter
  • 1 medium yellow onion, diced
  • 1 tablespoon garlic, minced
  • 2 jalapenos, diced (I left the seeds in for some heat but you could take them out)
  • 2 cups sausage ( you could use chicken, shrimp, I made 2 with salmon for me)
  • 1 can diced green chilies, 4 ounces
  • 1 tablespoon ranch dressing mix
  • 1 can pumpkin, 15 ounces
  • 1 cup heavy cream
  • 1/2 cup chicken broth
  • 1 teaspoon chili powder
  • 1 teaspoon garlic powder
  • 2 teaspoons cumin
  • 1 teaspoon salt
  • 1/2 teaspoon pepper
  • 10-12 corn tortillas
  • 1 cup Queso Fresco, crumbled
  1. In a large skillet, melt the butter, add the onion and saute until translucent (about 5 minutes).  Next, add the jalepenos and garlic and cook for another 2 minutes.  Add the sausage, green chilies and ranch dressing mix and stir everything to combine.  
  2. While that is heating through, combine the pumpkin, heavy cream, chicken broth, chili powder, garlic powder, cumin, salt and pepper in a bowl. Whisk to combine and spread a little bit of the sauce on the bottom of your pan.
  3. Take your corn tortillas and fill each one with around 2 tablespoons of the sausage mixture. Wrap and arrange in casserole dish, seam side down (I used 8 tortillas during this step).  Top the enchiladas with the remaining sauce, and crumble your Queso Fresco on top.  
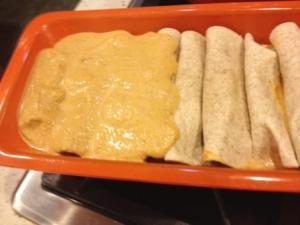
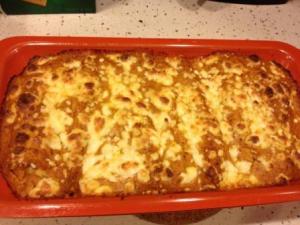
  4. Bake for 25-30 minutes, until warm and bubbling. 
CopyCat: Ben & Jerry’s Mint Oreo Ice Cream

7 Jul

Reviewed by: New York Tort
Magic Theme: Copycat- Find a famous recipe and recreate your own

When I got the ice cream maker for my birthday, Tortnado recommended I buy the Ben & Jerry’s Homemade Ice Cream and Dessert Book and use something for the Copy Cat challenge.
I chose the Mint Oreo Ice Cream because Oreos are my favorite and I was curious about using real mint in my recipe. However, Ben & Jerry’s recipe uses mint extract instead of real mint! I did a lot of research to see how to make ice cream with fresh mint, but ultimately I decided to follow the recipe. I chose to use the extract because I had some leftover from a Candy Cane Christmas recipe and also because fresh mint takes longer because you need to heat it and steep it in milk and cream and that takes a bit longer.
In my opinon, the extract has a powerful mint flavor that smells great, but I think the taste is a bit too extract-y and processed for me. It has a bite I don’t associate with fresh mint. This is not to say it’s not a great recipe, I’ve eaten bowls of this ice cream for breakfast, but next time I make it I’m going to try the fresh mint process and just add the Oreos. I’m interested in the comparison, and when I do it I’ll report back.
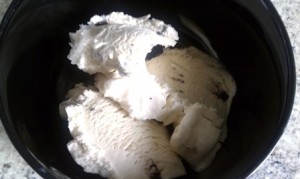
Anyway here’s the recipe and it is delicious. What’s better than mint and oreos?! Um… almost nothing.
Ingredients:
  • 2/3 cup coarsely chopped Oreo cookies
  • 2 large eggs
  • 3/4 cup sugar
  • 2 cups heavy cream
  • 1 cup milk (I used whole milk)
  • 2 teaspoons peppermint extact
1. Place the cookies in a bowl, cover, and refrigerate.
2. Whisk the eggs in a mixing bowl until light and fluffy, 1 to 2 minutes. Whisk in the sugar, a little at a time, then continue whisking until completely blended, about 1 minute more. Pour in the cream and milk and whisk to blend. Add the peppermint extract and blend again.
 
2a. Cover the bowl and put it in the fridge for 1 hour (The cookbook doesn’t have this step, but my ice cream maker recommends that the ingredient be nice and cold before putting it into the machine)
3. Transfer the mixture to an ice cream maker and freeze following the manufacturer’s instructions.
4. After the ice cream stiffens (about 2 minutes before its done) add the chopped cookies and then continue freezing until the ic cream is ready.
Makes slightly more than 1 quart.

Say Cheese!: Crab & Brie Quesadillas

13 Jun

Reviewed by: New York Tort
Magic Theme: Say Cheese!

I was assigned brie. I was totally excited for the cheese challenge but with finals approaching I’ve been busy and done very little cooking. But, even though I’m crazy I still want something delicious so I was excited when I found a recipe for crab & brie quesadillas. What I made is inspired by this recipe from Emeril Lagasse: http://www.foodnetwork.com/recipes/emeril-lagasse/crab-and-brie-quesadilla-with-chili-apple-glaze-recipe/index.html.

I felt a little nervous because the recipe didn’t get rave reviews, but I love crab and brie so I thought I’d try. I did not make the salsa Emeril suggested because I’m poor and lazy so I just bought some salsa that I liked and used that instead. It keeps cooking time down. So here’s what I did:

 Ingredients:

  • 1 cup of crab meat
  • salt, pepper, and Old Bay
  • 1 heaping tsp of cream cheese (I used herb & chive)
  • 2 tbsp green onions chopped (tops only)
  • tortillas
  • brie cheese

1. Start with 1 cup of crab meat. Season with salt, pepper, and Old Bay to your liking. As someone from Baltimore, I think Old Bay is essential. Also it could definitely be one of the reasons why other people didn’t find it as flavorful because Old Bay is the best.

 1a. Add the chopped onions and mix them in with the crab mixture.
1b. I added 1 tsp of herb & chive cream cheese. It’s not in Emeril’s recipe, but I think it was integral to Tort Fire’s crab dip recipe. Also I think it keeps it moist and I thought maybe it would hold the quesadilla together.
2. Take a tortilla and put mixture on one half.
3. Put slices of brie on top of the crab mixture. Add as much as you like. I did about 5 slices.
4. Fold the other side of the tortilla so it makes a half moon shape. Cook. In the skillet cook on each side for ~1 minute each. In the panini press cook for about 3 minutes or until its reached desired heat and gooey-ness
I cooked one each way. Surprisingly I liked the skillet better. I had thought the George Forman would be my favorite. Here are the pros and cons-
Skillet:
Pro: It’s a crispier tortilla and better heated throughout
Con: It doesn’t stick together as well. Perhaps cheese on both sides of the crab would have helped act as a glue
George Forman:
Pro: Holds together better and looks prettier
Con: Doesn’t get as warm all the way through
Overall my assessment is that this a fancy upgrade of an easy recipe. It really isn’t mind-blowing in terms of taste but if you like cheese and crab it’s going to be yummy, but your world won’t be rocked Also, I felt that cheddar cheese would be much better because I felt like the brie’s taste sort of disappeared. That seemed surprising to me since brie usually has a distinct taste, but I just felt like it melted away. Anyway, I would make this again because I love crab, cheese, and Old Bay but it’s not your fancy show off meal.

Say Cheese!: Chicken Parmesan Rotallini

13 Jun

Reviewed by: Tort Fire
Magic Theme: Say Cheese!
My magic ingredient was parmigiano reggiano. I made two recipes, a main dish and side dish and they both were delicious. I’ll definitely be making both again! I found both of them from the Food Network’s site.

Chicken Parmesan Rotallini

  • 1 cup fat-free low-sodium chicken broth
  • 1 clove garlic, thinly sliced (I used much more garlic)
  • 1 14.5-ounce can crushed San Marzano or fire-roasted tomatoes 5 or 6 fresh basil leaves, torn into small pieces
  • Kosher salt and freshly ground pepper
  • 4 thin (1/8-inch-thick) chicken cutlets (4 ounces each)
  • 1/4 cup chopped fresh parsley (I used spinach instead b/c I’m not the biggest fan of parsley and I thought more veggies would be nice)
  • 6 ounces shredded part-skim mozzarella cheese (about 1 cup) (I used the fancy kind, YUM)
  • 1/4 cup grated parmesan cheese (Also fancy)
  • 1/4 cup breadcrumbs
  • 1 large egg white
  • Cooking spray

Directions

1. Position a rack in the upper third of the oven and preheat to 450 degrees F.

2. Cook the broth, garlic, tomatoes and basil in a skillet over medium-high heat, stirring occasionally, until slightly thickened, about 15 minutes. Season with salt and pepper. Cover to keep warm.

3. Season the chicken with salt and pepper; place smooth-side down on a work surface.

4.Sprinkle with the parsley and mozzarella. Starting at the short end, roll up to enclose the filling. Secure with a toothpick. (If you don’t have toothpicks like me just putting it seal side down was enough to keep it together)

5. Mix the parmesan and breadcrumbs in a shallow dish. Put the egg white in another dish and beat until foamy. (I don’t think my egg ever got ‘foamy’)

6. Mist a cast-iron skillet with cooking spray. (I used a baking sheet) Dip the chicken rolls in the egg white, then coat with the breadcrumb mixture.

7. Place in the skillet, seam-side down. Sprinkle with any remaining breadcrumbs and mist with cooking spray. (I didn’t see that part about misting with cooking spray until now. clearly that didn’t make a difference)

8. Bake until cooked through, about 20 minutes. Serve with the tomato sauce, and polenta, if desired.

Per serving: Calories 355; Fat 14 g (Saturated 7 g); Cholesterol 105 mg; Sodium 848 mg; Carbohydrate 15 g; Fiber 2 g; Protein 44 g

Boozy Baker: Tilapia Wine and Tomatoes

5 Apr

Reviewed by: Tort Fire

I went the non dessert route and made tilapia that I found at Allrecipes. I modified it a bit and ended up follwoing the first comment more than the recipe because I don’t have a grill. It was ok, I think it was a little bland, but maybe I just didn’t put enough salt and pepper to begin with. I did think there was too much wine and I felt like that washed away some of the seasoning. I actually poured some out into a sauce pan and cooked it down and thought the sauce then tasted much better. I threw that back oer the fish and I’ll see if it soaks in. If so, then I’d say this dish is a winner.

Ingredients

  • 4 (4 ounce) fillets tilapia
  • salt and pepper to taste
  • 6 cloves garlic, pressed
  • 4 fresh basil leaves, chopped
  • 1 large tomato, chopped
  • 4 tablespoons of butter (Optional)
  • 1 cup white wine

Directions

  1. Preheat the oven to 425 degrees.
  2. Sprinkle olive oil on the bottom of a baking dish large enough to hold your fillets.
  3. Place the tilapia fillets side by side in large baking dish. Season each one with salt and pepper. Place one tablespoon of butter (I put a little bit, not a whole tablespoon) on top of each piece of fish, and sprinkle garlic, basil and tomato. Pour the wine over everything.
  4. Cover with foil.
  5. Bake for 20 minutes or until the fish flakes.

Ides of March: Pork Souvlaki

24 Mar

Reviewed by: Tortalicious

So I made this a long time ago, I’m just very lazy typing it up. I know soy sauce isn’t exactly Greek; okay, it’s not Greek at all. This is a bastardization of real souvlaki, but good nonetheless. Personally, I thought it was a little too salty but Rick LOVED it. You can also use this marinade for all sorts of meats, not just pork.

I didn’t grill them, but stuck the entire marinade in the oven for 25min at 400F. I then removed the pork and veggies and added a tbsp of cornstarch to the left over marinade to thicken it up. If I was actually using the full 4lbs of tenderloin (I only used 1lb) I’d double the marinade.

Souvlaki (altered from allrecipes.com)

  • 1 lemon, juiced
  • 1/4 cup olive oil
  • 1/4 cup soy sauce
  • 1 teaspoon dried oregano
  • 3 cloves garlic, crushed
  • 4 pounds pork tenderloin, cut into 1 inch cubes
  • 2 medium yellow onions, cut into 1 inch pieces
  • 2 green bell peppers, cut into 1 inch pieces
  1. In a large glass bowl, mix together lemon juice, olive oil, soy sauce, oregano, and garlic; add pork, onions, and green peppers, and stir to coat. Cover, and refrigerate for 2 to 3 hours.
  2. Preheat oven 400F. Cook for 25min in marinade until pork is done.
  3. Turn off oven. Remove veggies and pork. Add 1 tbsp cornstarch to marinade and place back in cooling oven for a few minutes.


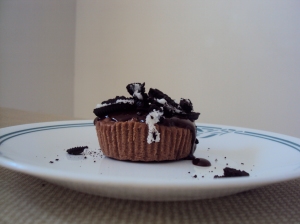
The Boozy Baker: Chocolate Bailey’s Oreo Cheesecakes

24 Mar

Reviewed by: Tortalicious
Alcohol used: Bailey’s Irish Cream (actually, I used the knock off, St. Brendan’s)

These cheesecakes are very sweet and creamy. The Bailey’s taste is very subtle and I HIGHLY recommend that you don’t skimp on the chocolate glaze. I initially wasn’t going to do it because I don’t use heavy cream often, but without the glaze it tastes..like it needs more chocolate. Sounds funny, but it’s true! In total I made about 17 cupcakes.

Chocolate Bailey’s Oreo Cheesecakes (from Gingerbread Bagels)

Crust
15 whole Oreos (you may need more/less)

Cheesecake Batter

  • 1 pound softened cream cheese (that’s 2 packages of cream cheese)
  • 3/4 cup sugar
  • 3 Tablespoons unsweetened cocoa powder
  • 2 Tablespoon all purpose flour
  • 2 large eggs, at room temperature
  • 4 Tablespoons Bailey’s Irish Cream
  • 1/3 cup sour cream

Chocolate Glaze

  • 2 ounces semi sweet chocolate chips (~ 4 Tbsps)
  • 1/4 cup heavy whipping cream
  1. In a large mixing bowl with the paddle attachment (a handheld mixer works fine), mix together the softened cream cheese, sugar, unsweetened cocoa powder and all purpose flour. Once that’s combined, add in the eggs, one at a time.
  2. Add in the Bailey’s Irish Cream. Then add in the sour cream. Mix to combine. Set aside.
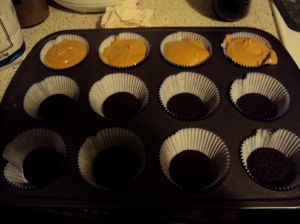
  3. Line a cupcake pan with cupcake liners. Place a whole Oreo in each cupcake liner.
  4. Using an ice cream scooper, scoop the cheesecake batter on top of each Oreo. If you need to, spread out the cheesecake batter. 
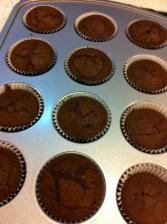
  5. Bake the cheesecakes at 300 degrees for about 20-25 minutes or until the cheesecakes are set. Once the cheesecakes are done baking, cool them in the refrigerator overnight. Keep the cheesecakes in the cupcake pan while they cool.
  6. After the cheesecakes have cooled overnight, make the chocolate glaze.
  7. Put the chocolate chips in a bowl. Pour the heavy whipping cream into a small saucepan and bring to a boil. Once it boils, remove from the heat and pour it over the chocolate chips. Whisk the ingredients together until completely combined. 
  8. Allow the chocolate glaze to sit for a couple of minutes. Then spoon the chocolate glaze over the cheesecakes.
  9. If you liked, crush up some Oreos in a food processor and sprinkle on top of the chocolate glaze.

The Ides of March: Blood Orange and Olive Oil Cake

15 Mar

Reviewed by: New York Tort

I was so excited when the Ides of March challenge was announced because I’m a huge nerd and love: Rome, Roman History, Julius Caesar, and Shakespeare. Also, I had a recipe in mind that I really wanted to make and it fit perfectly into this challenge. What I made was a Blood Orange and Olive Oil Cake, and the recipe I got from smittenkichen.

So here’s my back story. Olive oil and blood oranges, although nowadays they can be found and produced elsewhere are a product of the Mediterranean. Also, when I studied abroad in Rome it was the first time I had blood oranges. As part of my program we could go to this little restaurant and get breakfast every day. The man who worked there didn’t speak any English but he always wanted us to eat enough so he gave us coffee, fruit, yogurt, and a pastry. I’ve included a picture of my incredibly delicious Roman breakfast, and you can see a picture of the orange and also that amazing cappuccino.

I love the ingredients. Olive oils is one of my favorite things. Also, I think blood oranges are just beautiful, and messy, and gorgeously delicious. I mean look at the pictures for when I supreme the orange because it’s just such a rich color. Which the color applies to Julius Caesar because, sorry to be morbid, one of the things he’s best known for is being stabbed repeatedly.
This recipe is wonderful. Sweet, but not overly so and also refreshing because of so much citrus. I fed it to my friend Emily and she said if it was her cake she’d eat it all. And oftentimes when I make a lot of food I bring it to one of my classes, but I’m not, I’m going to eat it all myself. I even had it for breakfast.

And here’s a little Shakespeare for you because once an English major always an English major: “As he was valiant, I honour him” – Julius Caesar 3.2.27

Anyway here’s the recipe:

  • Butter for greasing pan
  • 3 blood oranges
  • 1 cup sugar
  • Scant 1/2 cup buttermilk or plain yogurt
  • 3 large eggs
  • 2/3 cup extra virgin olive oil
  • 1 3/4 cups all-purpose flour
  • 1 1/2 teaspoons baking powder
  • 1/4 teaspoon baking soda
  • 1/4 teaspoon salt
  • Honey-blood orange compote, for serving (optional, but you totally should!)
  1. Preheat oven to 350 degrees. Butter a 9-by-5-inch loaf pan. Grate zest from 2 oranges and place in a bowl with sugar. Using your fingers, rub ingredients together until orange zest is evenly distributed in sugar. 
  2. Supreme an orange: Cut off bottom and top so fruit is exposed and orange can stand upright on a cutting board. Cut away peel and pith, following curve of fruit with your knife. Cut orange segments out of their connective membranes and let them fall into a bowl. Repeat with another orange. Break up segments with your fingers to about 1/4-inch pieces. 
  3. Halve remaining orange and squeeze juice into a measuring cup; you’ll will have about 1/4 cup. Add buttermilk or yogurt to juice until you have 2/3 cup liquid altogether. Pour mixture into bowl with sugar and whisk well. Whisk in eggs and olive oil.
  4. In another bowl, whisk together flour, baking powder, baking soda and salt. Gently stir dry ingredients into wet ones. Fold in pieces of orange segments. Pour batter into prepared pan.
  5. Bake cake for 50 to 55 minutes, or until it is golden and a knife inserted into center comes out clean. Cool on a rack for 5 minutes, then unmold and cool to room temperature right-side up. Serve with whipped cream and honey-blood orange compote (below), if desired.

Honey-Blood Orange Compote: Supreme 3 more blood oranges according to directions above. Drizzle in 1 to 2 teaspoons honey. Let sit for 5 minutes, then stir gently.

Chocolate Cupcakes with Marshmallow Frosting

10 Feb

Reviewed by: Tortnado
Magic Theme: Do You Feel The Love? – Torts must include two aphrodisiac ingredients in their recipe(s).

I made these sexy cupcakes last night, they have 3 aphrodisiacs, and if you include the wine David and I drank while we ate them 4! The recipe was fairly easy to follow, it called for all-purpose flour and I substituted it with whole wheat, only because that’s all I had. I have never made my own frosting and I was a little scared while making it because I thought my soft peaks would never become stiff  but after beating it for  7-10 minutes they did indeed get stiff (that’s what she said) The frosting was so pretty and fluffy and it did taste like a marshmallow.

Chocolate Cupcakes with Marshmallow Frosting
Makes 12

For the cupcakes:

  • 1/4 cup of whole wheat flour
  • 1/3 cup of unsweetened cocoa powder
  • 1/4 teaspoon baking powder
  • 1/2 teaspoon baking soda
  • 1/4 teaspoon salt
  • 4 tablespoons unwanted butter, softened
  • 1/2 cup dark brown sugar
  • 2 large eggs
  • 3 tablespoons strong brewed coffee
  • 1 teaspoon vanilla
  • 1/2 fat free buttermilk

For the frosting:

  • 1/2 cup sugar
  • 1/4 cup water
  • 1 large egg white
  • 1/2 teaspoon pure vanilla
  • 1/8 teaspoon cream of tartar
  • Pinch of salt

Preheat oven to 350F. Line a 12 cup muffin tin with paper liners.

To make the cupcakes:

  1. In a large mixing bowl, combine flour, cocoa, baking powder, baking soda and salt.
  2. In another large bowl beat butter and sugars with an electric mixer until fluffy. Add eggs, one at a time, beating well with each addition. Beat in coffee and vanilla. Add flour mixture, alternating with buttermilk, until batter is smooth.
  3. Fill muffin tins 2/3 full and bake for 20 minutes or until a toothpick inserted into the center of the cupcake comes out clean. Leave to cool in tin for 5 minutes. 

To make frosting:

  1. Combine sugar and water in a small, heavy saucepan over medium high heat. Stir constantly for 3 minutes or until sugar dissolves.
  2. Beat egg white, vanilla, cream of tartar and salt in a large bowl with an electric mixer till soft peaks form. Gradually add sugar syrup; beat until stiff peaks form and mixture is glossy in texture, about 7-10 minutes more.


Brownie Torte

10 Feb

Reviewed by: Tort Fire

Magic Theme: Do You Feel The Love? – Torts must include two aphrodisiac ingredients in their recipe(s).

This recipe is my aphrodisiac one and I made our first torte!!!!
I got this from allrecipes too and I didn’t alter it much:
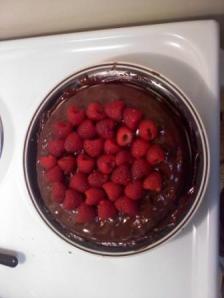
My magic ingredients were chocolate, almonds, and raspberries. If we hadn’t ran out of vanilla this would have been a quadruple threat (Although Sean and I also had wine with this, so basically quadruple) I tried while it was still hot b/c I didn’t read the chill until set part until just now. It was pretty good, but I like it even better now that it’s cold. The raspberries kind of made their own juice and the chocolate glaze hardened around it. Yum.

Ingredients

  • 1/2 cup butter
  • 1/2 cup light corn syrup
  • 1 cup semisweet chocolate chips
  • 1/2 cup white sugar
  • 3 eggs
  • 1 teaspoon vanilla extract (we ran out, so I didn’t use any)
  • 1 cup all-purpose flour
  • 1 cup chopped walnuts (I’m not s fan of walnuts so I used a combination of almonds and macadamian nuts)
  • 1/2 cup semisweet chocolate chips
  • 2 tablespoons butter
  • 1 tablespoon light corn syrup
  • 1 teaspoon vanilla extract (still out of it)
  • 2 cups sliced fresh strawberries (I used raspberries instead)

Directions

  1. Butter and flour a 9 inch round cake pan.
  2. In a pan over low heat, melt 1/2 cup butter and 1/2 cup light corn syrup.
  3. Stir in 1 cup chocolate chips until melted.
  4. Remove from heat and add sugar and eggs, and stir until blended.
  5. Stir in 1 teaspoon vanilla , flour, and nuts.
  6. Pour into pan. Bake at 350 degrees F (175 degrees C) for 30 minutes, or until center springs back when touched. (One comment suggested stirring it halfway through to keep it moist throughout. I did that just in case)
  7. Cool in pan 10 minutes. Then place on a cooling rack. (I was too impatient for this and I don’t rack. I let it cool while I was making the glaze)
  8. To Make Glaze: Combine chocolate chips, 2 tablespoons butter or margarine and corn syrup in pan. Stir over low heat till chocolate chips are melted. Remove from heat. Stir in vanilla.
  9. Frost tops and sides of torte. Chill until set. Garnish with raspberries.